If you are using Windows as your operating system when developing your websites you should always test your websites on your local system before you upload the files to your live server.
Although there are several pre-packaged Apache-PHP-MySQL (WAMP) packages available for download when using these you are bound to their release cycles and the structure of the directories they are using.
This article describes how you can install Apache, PHP and MySQL manually on your local system with maximum flexibility because you can quickly update one program if the need may arise, e.g. if a new PHP version has been released.
This method also shows you where specific files are located which you may need to edit when changing settings so you can dive a bit deeper into the configuration files which may be quite helpful if an error occurs.
WAMP Setup
In this tutorial I’m assuming the following:
* Apache, PHP and MySQL are installed to subdirectories of d:\webserver
* The document root is d:\webroot
* the first test domain is www.webserver.local
* the document root for that VirtualHost is
d:\webroot\www.webserver.local\htdocs which will contain all
documents accessible via the browser
Installing The Apache Server
First of all you need to download the latest Windows distribution of the Apache HTTP server from the Apache download page. Pick the MSI installer including OpenSSL which is named something like „Win32 Binary including OpenSSL 0.x.x (MSI Installer)” and is listed under the section named something like “Apache HTTP Server 2.2.xx is the best available version”.
After launching the setup program pick the „Custom” setup and choose the directory d:\webserver\Apache as the installation path. Enter the information as shown in the screenshots below.


Installing PHP
Dowload the latest (stable) PHP 5 version from the PHP download page. Choose the „PHP 5.x installer”. After download and launching the file when prompted to select a directory choose d:\webserver\PHP

Webserver Setup – “Select the Web Server You Wish To Set Up” select “Apache 2.2.x”.

When prompted for the Apache configuration directory select d:\webserver\Apache\conf.

On “Choose Items To Install” select the extensions you’d like to install.
If you don’t know which might be useful you may use the following list to find some suggestions:
* cURL (good for accessing HTTP servers)
* EXIF (if you’re dealing with photos and wish to extract meta information)
* GD2 (image creation and manipulation)
* Multi-Byte String (mbstring, for i18n, e.g. conversion from ISO-8859-1 to
UTF-8)
* mcrypt (for encryption)
* mysql, mysqli
* other database extensions you might be using (postgreSQL etc.)
* OpenSSL (for accessing https URLs)
* PDO, PDO_Mysql, PDO_SQLITE
* SOAP (if you’re planning to access SOAP resources or create you own
SOAP server)
* SQLite
Installing MySQL
To download the MySQL server visit this MySQL website and download the Windows MSI Installer package under „Community Edition”.
To ease administration and creation and editing of tables and databases I encourage you to download and install the MySQL GUI tools as well.
In the MySQL setup dialog pick the custom installation and select the directory d:\webserver\MySQL as the installation directory.


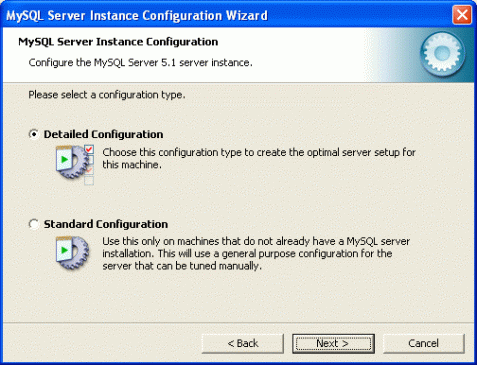
When configuring the MySQL server use the detailed configuration.
Use “Developer Machine” as your server type

Select “Multifunctional Database” in the database usage dialog:

Keep the default InnoDB tablespace settings and click Next:

Select “Decision Support” on the next dialog:

Keep the default values on the next screen:

When prompted to select a character set use the one that fits best, I’m using UTF-8 as the default charset.

On the next dialog you have to choose whether to install the server as a Windows service and if it shall be started automatically at boot time. This setting depends on how often you’re developing on your system. I’m keeping MySQL running in the background most of the time because it doesn’t eat that much memory.

The next dialog prompts you to select a root password. Keep this in mind.

After the installation has finished the MySQL server is already running and you can now begin to configure PHP and Apache.
Configuring Your System
For every VirtualHost (i.e. website/domain) you need to add a corresponding entry to your HOSTS file so that your browser knows that the given domain will be handled by the webserver running on your local system. Edit the file c:\windows\system32\drivers\etc\hosts with a text editor.
Windows Vista Information
On Windows Vista you have to launch Notepad as an administrator to see and edit the file.
Add a new line to your hosts file which has the following content:
127.0.0.1 www.webserver.local
Now requests to www.webserver.local from your browser will be sent to the webserver running on your local system.
Configuring The Apache Webserver
There are actually two files to edit. Please note that you always need to use forward slashes or a double backslash in path names.
General Settings
Open the file d:\webserver\Apache\conf\httpd.conf and search for the line reading
DocumentRoot “D:/webserver/Apache/htdocs”
The default document root is D:/webserver/Apache/htdocs. We now need to change this to point to the d:\webroot directory as defined above. So change this line now to
DocumentRoot “d:/webroot”
You also need to modify the line reading
<Directory “D:/webserver/Apache/htdocs”>
to
<Directory “D:/webroot”>
If you wish to use .htaccess files you also have to change the line reading
AllowOverride None
to
AllowOverride All
To include the VirtualHosts file which will contain all mappings of hostname to document root directory (and more) you have to change the line
#Include conf/extra/httpd-vhosts.conf
to
Include conf/extra/httpd-vhosts.conf
To enable automatic execution of an index.php file when the user accesses a directory (which you should always do) you need to add index.php to the DirectoryIndex directive just as in this example – simply add „index.php” to the end of the line:
<IfModule dir_module>
DirectoryIndex index.html index.php
</IfModule>
Creating The VirtualHosts Configuration
Open the file d:\webserver\Apache\conf\extra\httpd-vhosts.conf. Now it’s time to create a VirtualHost for our domain www.webserver.local.
Just add the following block to the end of the file.
<VirtualHost *:80>
ServerAdmin webmaster@example.com
DocumentRoot “D:/webroot/www.webserver.local/htdocs”
ServerName www.webserver.local
ErrorLog “logs/webserver.local-error.log”
CustomLog “logs/webserver.local-access.log” common
</VirtualHost>
This will tell Apache…
* that the server administrator can be reached via webmaster@example.com (no need to enter your real email address, because on your own development system you’re the only one that would see your real email address so it doesn’t make sense * that the documents for www.webserver.local can be found in the directory d:/webroot/www.webserver.local
* to log errors to the file d:/webserver/Apache/logs/webserver.local-error.log
* to log every access to d:/webserver/Apache/logs/webserver.local-access.log
Creating The Documents
Create the directory D:/webroot/www.webserver.local/htdocs recursively and create the file D:/webroot/www.webserver.local/htdocs/index.php with the following contents:
<?php phpinfo(); ?>
Configuring PHP
The default PHP installation would not show you any errors in the browser and instead just return a 500 server error which would materialize as an empty white page.
Although this is the recommended setting for productions servers where you do not normally want to reveal any specific information like paths when an error occurs this makes life quite hard on your local development server.
To enable the display of error messages in the browser open your php.ini file which is located at d:\webserver\php\php.ini and change the line
display_errors = Off
to
display_errors = On
To enable sending of emails via the mail() function you need to define a specific SMTP server name and port. You would normally enter your providers’s mail server name here. Please keep in mind that some providers use a so-called „POP-Before-SMTP” so that sending mails with PHP may fail if you have not downloaded new messages via POP3 from the server before.
Testing The Installation
Now you are ready to test your new web server. First of all you need to restart the Apache server via the included taskbar tool or via the Windows services panel.
After that open up your browser and enter http://www.webserver.local/
This should show the phpinfo() page.


Leave a comment